Master Natural Light Portraits: 7 Techniques for Stunning Results

Natural light portrait photography separates amateur snapshots from professional work—no expensive strobes required. This guide breaks down seven field-tested techniques for capturing portraits that glow: window light positioning, golden hour timing, open shade mastery, reflector use, backlighting secrets, indoor location scouting, and handling harsh midday sun. Whether shooting with a DSLR or the latest iPhone 15 Pro, these methods work anywhere with zero extra gear.
What's the Best Time of Day for Natural Light Portraits?
The hour after sunrise and the hour before sunset—called "golden hour"—delivers the softest, most flattering light available outdoors. The sun sits low, casting long shadows and wrapping skin tones in warm, golden hues that no filter can replicate authentically.
Here's the thing: not all golden hours are created equal. Summer evenings near Brooklyn's Prospect Park (around 7:30–8:30 PM in July) provide deeper orange tones than winter mornings at the same location. The best approach? Scout locations using The Photographer's Ephemeris—a free tool that maps sun position for any date and GPS coordinate.
That said, don't pack up when golden hour ends. Blue hour—that 20–30 minute window after sunset—creates moody, cinematic portraits with cool, even tones. Many editorial photographers (think Vogue contributors like Peter Lindbergh) built careers on this underused lighting window.
How Do You Position a Subject for Window Light Portraits?
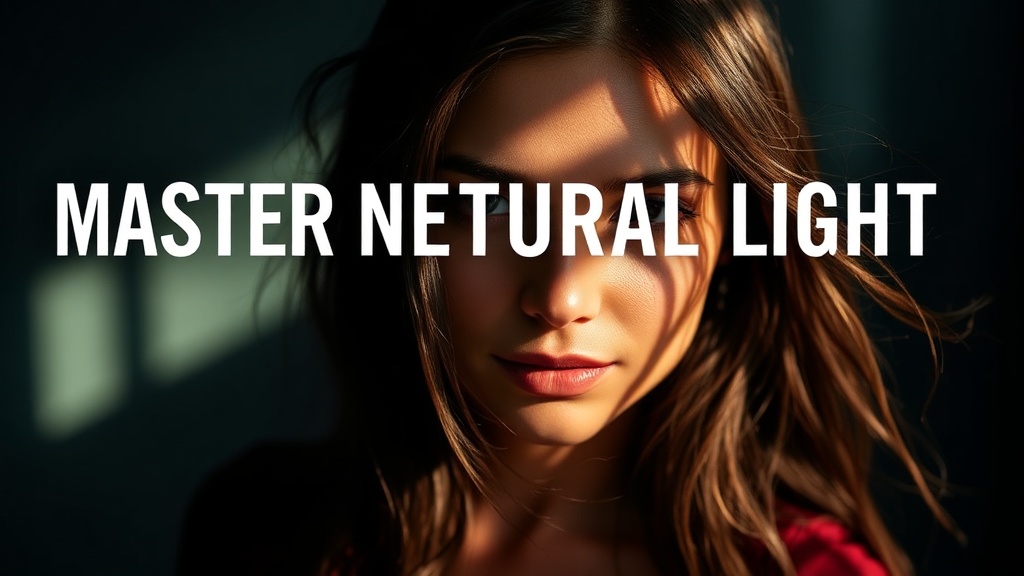
Place the subject 45 degrees to the window, roughly 3–6 feet from the glass—this creates dimensional, Rembrandt-style lighting with gentle shadows that sculpt facial features. The window acts like a massive softbox (a photographer's dream modifier), diffusing harsh sun into creamy, wraparound illumination.
Not all windows work equally well. North-facing windows in the Northern Hemisphere provide consistent, shadowless light throughout the day—ideal for beauty portraits and headshots. South-facing windows blast direct sun (harsh and unflattering) unless diffused with sheer curtains or diffusion fabric.
For dramatic effect, try sidelighting: position the subject parallel to the window. One side catches soft light while the other falls to shadow. Fill that shadow with a Westcott 5-in-1 Reflector ($35 on Amazon)—the silver side adds crisp contrast, white provides gentle fill, and gold warms skin tones artificially (use sparingly).
What Is Open Shade and Why Does It Matter?
Open shade refers to areas blocked from direct sunlight but still illuminated by ambient sky light—think building overhangs, tree canopies, or alleyways. The light here is even, shadowless, and doesn't force subjects to squint. It's the most forgiving lighting condition for beginners.
The catch? Not all shade is created equal. "Deep shade" (think under dense trees) casts green color casts from leaf reflection. "Open shade" faces a bright sky or reflective surface—providing clean, neutral light. Position subjects near the edge of shadow (facing out toward the light source) for catchlights—those small reflections in the eyes that bring portraits to life.
In Brooklyn, the covered walkways near Brooklyn Bridge Park offer textbook open shade from spring through fall. Dumbo's Washington Street (famous for the Manhattan Bridge view) works beautifully on overcast days when the stone buildings act as giant reflectors.
Indoor vs. Outdoor Natural Light: Quick Comparison
| Factor | Window Light (Indoor) | Open Shade (Outdoor) | Golden Hour (Outdoor) |
|---|---|---|---|
| Consistency | Highly consistent | Variable by time/season | Limited to 1–2 hours daily |
| Background Control | Easier (walls/clutter manageable) | Moderate (street elements intrude) | Challenging (exposure balance) |
| Gear Needed | Reflector recommended | Optional reflector | Lens hood recommended |
| Best For | Editorial, beauty, corporate | Lifestyle, casual, family | Dramatic, romantic, cinematic |
| Post-Processing | Minimal correction needed | Watch for color casts | Often requires gradient filters |
Can You Shoot Portraits in Harsh Midday Sun?
Yes—with the right techniques. Midday sun (roughly 10 AM to 3 PM) creates unflattering raccoon shadows under eyes and blown highlights on foreheads. Most photographers avoid it. That creates opportunity—less crowded locations, and subjects often have more energy.
Technique one: Find solid shade. Building shadows, umbrellas, or even a held reflector above the subject's head blocks overhead sun completely. Technique two: Backlighting. Position the sun behind the subject, let it rim their hair with golden highlights, and expose for the face (not the background). The background blows out bright—sometimes that's exactly the high-key look you want.
Equipment helps. A circular polarizing filter (the B+W XS-Pro runs about $80 for 77mm threads) cuts glare on skin and deepens sky tones. Don't cheap out on filters—poor glass degrades image quality faster than any camera body upgrade can fix.
How Do You Use Reflectors Without an Assistant?
Reflectors don't require a second pair of hands—just creativity. Clamp a 32-inch reflector to a light stand using an A-clamp ($5 at hardware stores). Lean it against a chair, rock, or backpack. Have the subject hold it below their waist for clamshell lighting (shadowless, beauty-style illumination).
Worth noting: White foam core boards from Dollar Tree work identically to expensive photography reflectors for most applications. Buy three. They're lighter, more rigid, and if one gets destroyed at a beach shoot, you're out $1.25 instead of $40.
For solo shooters, the "selfie method" works: mount the camera on a tripod, position the reflector using the self-timer delay, review, adjust. It slows the process down—sometimes that's beneficial. Portrait photography isn't race photography. Deliberate setup yields deliberate results.
What's the Secret to Catchlights in Natural Light?
Catchlights—the small reflections of light sources visible in a subject's eyes—add life, dimension, and connection to portraits. Without them, eyes look flat and dead. The larger and closer your light source, the bigger and softer the catchlight appears.
Window light creates rectangular catchlights (professional and editorial). Open sky creates larger, softer catchlights (friendly and approachable). Combine both by positioning subjects near a window while facing a bright wall or white curtain—double catchlights, double dimension.
Here's a pro trick: hold a small reflector just below the frame line, angled up at the subject's face. It creates a second catchlight below the main one—classic clamshell glamour lighting used in Vanity Fair covers. Remove it in post if two catchlights feel unnatural; most viewers never consciously notice, but they feel the difference.
How Do Camera Settings Affect Natural Light Results?
Natural light is unpredictable—settings must adapt. Start with aperture priority mode (A or Av on most cameras) at f/2.8 to f/4 for creamy background separation. In golden hour, ISO often creeps to 800–1600—modern cameras (Sony A7 IV, Canon R6, Nikon Z6 II) handle this cleanly.
Shutter speed matters more than many realize. The old "1/focal length" rule prevents camera shake, but subject movement requires faster speeds. For lifestyle portraits with motion, don't drop below 1/250s. For posed headshots, 1/125s works fine.
Metering mode choice separates controlled portraits from happy accidents. Evaluative/matrix metering averages the whole scene—reliable for evenly lit situations. Spot metering (measuring just the subject's face) prevents blown highlights in backlit scenarios. Learn both. Switch between them as conditions demand.
Phone shooters aren't excluded. iPhone 15 Pro's Portrait Mode now captures depth data for post-shot focus adjustment. Google's Pixel 8 Pro includes "Real Tone" processing specifically tuned for accurate skin rendering across all tones—technology that wasn't available five years ago. The gap between phone and dedicated camera narrows every generation.
"Light makes photography. Embrace light. Admire it. Love it. But above all, know light. Know it for all you are worth, and you will know the key to photography." — George Eastman
Natural light portrait photography rewards patience and observation more than equipment expenditure. The same window that lit Vermeer's subjects centuries ago still works today. The same golden hour that photographers chased in the 1970s returns every evening. Technique—positioning, timing, and understanding how light behaves—outlasts every camera generation. Shoot more. Chimp less. The light is already perfect; you just need to find where.