Mastering Golden Hour Photography: Capture Stunning Warm Light

This post breaks down everything you need to know about shooting during golden hour—that magical window just after sunrise and before sunset when the light turns warm, soft, and incredibly flattering. You'll learn the exact camera settings that work, how to plan your shoots down to the minute, and the common mistakes that ruin otherwise perfect shots. Whether you're shooting landscapes, portraits, or street photography, mastering this light will transform your images.
What Is Golden Hour Photography and Why Does It Create Such Stunning Images?
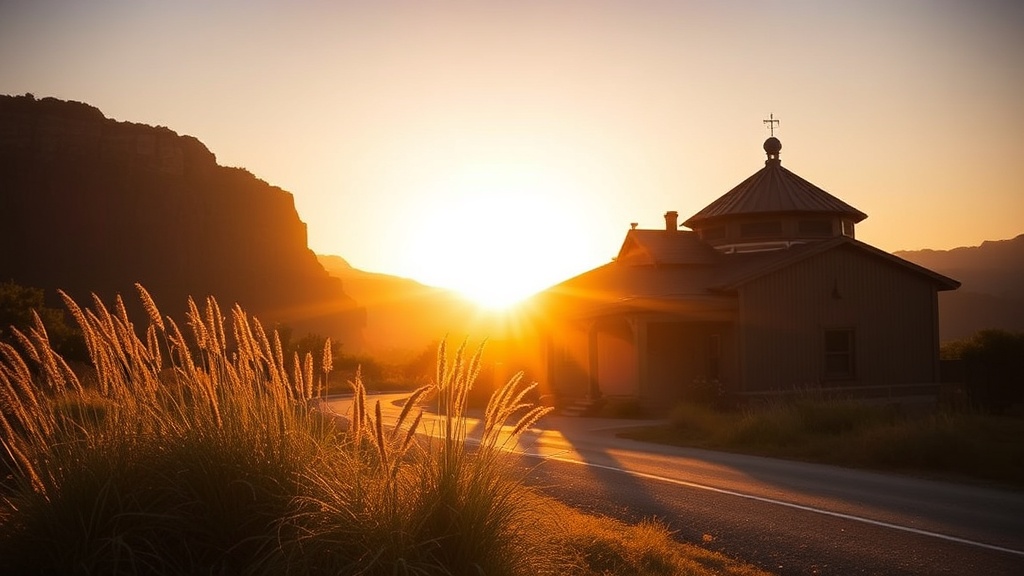
Golden hour refers to the period shortly after sunrise and just before sunset when the sun sits low on the horizon, casting a warm, diffused light that photographers chase obsessively. The light appears golden (hence the name), bathes everything in soft tones, and creates long, dramatic shadows that add depth and dimension to photographs.
The science behind it isn't complicated. When the sun hovers near the horizon, its light travels through more of Earth's atmosphere. This scatters the blue and green wavelengths, leaving behind the warmer reds, oranges, and yellows. The result? That buttery glow you see in magazine spreads and Instagram feeds.
Here's the thing—golden hour isn't actually an hour. Depending on your location, season, and weather, it might last 30 minutes or stretch to 90. Near the equator, it's shorter. In places like Acadia National Park during winter, you might get two hours of usable light.
The quality of light during this window solves problems that plague midday shooters. Harsh shadows disappear. Highlights don't blow out as easily. Skin tones look healthier and more natural. Landscapes gain a three-dimensional quality that's nearly impossible to replicate with editing software later.
That said, not all golden hour light behaves the same way. Sunrise golden hour tends to produce cooler tones, clearer air, and less wind—perfect for reflections in lakes and coastal shots. Sunset golden hour brings warmer colors, more atmospheric haze (which can be beautiful or frustrating depending on your goal), and often more dramatic cloud action.
What Camera Settings Work Best for Shooting During Golden Hour?
Start with aperture priority mode set to f/8 for landscapes or f/2.8 for portraits, keep ISO at its base value (usually 100), and let the shutter speed fall where it may—though you'll want to watch it doesn't drop too low and introduce camera shake.
Manual mode gives you the most control, but golden hour light changes fast. One minute you're shooting in comfortable light; the next, you're scrambling for exposure. Many pros swear by aperture priority with exposure compensation dialed in.
The catch? Your meter can get confused. Cameras want to expose everything as middle gray. Point your lens at a bright sunset, and the camera darkens everything, losing that warm glow you came for. Point it at shadow areas, and the sky blows out to white. The fix: learn to read your histogram and use exposure bracketing when the scene's dynamic range exceeds what your sensor can capture.
White balance deserves special attention. Auto white balance often neutralizes that golden warmth you're trying to capture—rendering it flat and gray. Try the "Daylight" or "Sunny" preset (around 5200K) instead. Or shoot RAW and adjust later. Better yet, experiment with the "Cloudy" or "Shade" presets (6000-7500K) to exaggerate those warm tones in-camera.
Shutter speed becomes critical when the light fades. If you're handholding, follow the reciprocal rule: your shutter speed should be at least 1/focal length. Shooting at 50mm? Stay above 1/50th of a second. Drop below that, and you'll need a tripod—or really steady hands.
Worth noting: bracketing saves shots. Take three exposures—one at the metered reading, one two stops under, one two stops over. Merge them later in Lightroom or Photoshop, or pick the best single frame. The Adobe Lightroom HDR merge function handles this beautifully.
How Do You Plan and Find the Perfect Golden Hour Location?
Use apps like PhotoPills, Sun Surveyor, or The Photographer's Ephemeris to calculate exact sunrise and sunset times for your location, including the direction the light will come from and how long you'll have to shoot.
Planning separates casual snappers from photographers who consistently nail golden hour shots. You can't just show up and hope. The sun's position changes dramatically throughout the year—that perfect overlook might face the wrong direction in winter versus summer.
Scout locations ahead of time. Visit during midday when you're not rushed. Note where the sun will set. Look for interesting foreground elements that'll catch that sidelight. Find leading lines that draw the eye toward the light source. Check for obstacles—buildings, trees, hills—that might block the sun earlier than expected.
Here's a breakdown of planning tools and their best uses:
| Tool/App | Best For | Price |
|---|---|---|
| PhotoPills | Comprehensive planning, AR sun position | $9.99 (one-time) |
| Sun Surveyor | Quick checks, moon photography | $7.99 (one-time) |
| The Photographer's Ephemeris | space planning, desktop use | Free (web) / $11.99 (app) |
| Timeanddate.com | Basic sunrise/sunset times | Free |
| Google Earth | Scouting terrain from home | Free |
Arrive early. At least 30 minutes before golden hour officially starts. The light changes fastest at the beginning and end of the window—you don't want to waste precious minutes setting up while the magic happens without you.
Weather apps lie. Partly cloudy forecasts often produce the most spectacular golden hour light—those scattered clouds catch fire with color. Completely clear skies can actually disappoint, creating harsh transitions and blown-out highlights. The best golden hour shots usually involve some cloud drama.
The catch? You need a gap on the horizon. If heavy cloud cover sits right where the sun rises or sets, you get nothing. High, scattered clouds above a clear horizon? That's jackpot territory.
Composition Tips That Make Golden Hour Photos Stand Out
Backlighting transforms ordinary subjects. Position your subject between you and the sun. Let that warm rim light outline them. Shoot wide open (f/1.8 or f/2.8) for creamy bokeh backgrounds that glow. The Canon EF 85mm f/1.8 and Sigma 35mm f/1.4 Art are favorites for this look.
Sidelight sculpts texture. Wood grain, fabric, skin pores, grass—sideways golden hour light emphasizes every detail. Turn your subject 90 degrees from the sun. Watch shadows define form in ways flat lighting never could.
Include sun flare deliberately. Shoot directly into the sun (carefully—don't damage your eyes or sensor). Stop down to f/16 or f/22 for that starburst effect. Use your lens hood—or don't, depending on whether you want artifacts and ghosting (sometimes they're beautiful).
Silhouettes work brilliantly during golden hour. Expose for the bright sky. Let your subject fall to black. The shapes become graphic, bold, and dramatic against that orange-red backdrop.
What Gear Do You Actually Need for Golden Hour Photography?
You don't need expensive equipment—but a few specific items make the experience smoother and your results more consistent.
A sturdy tripod becomes almost mandatory as light fades. The Peak Design Travel Tripod balances portability with stability, though budget options from Neewer work fine for starters. Look for something that extends to eye level without raising the center column (which compromises stability).
ND filters help when you want wide apertures in bright golden hour conditions. A 3-stop or 6-stop ND lets you shoot at f/1.4 without blowing highlights. Polarizers cut glare on water and foliage, though they'll also darken your sky and potentially reduce that golden warmth—use judiciously.
Graduated ND filters (half dark, half clear) help balance bright skies against darker foregrounds. The Cokin P-series or Lee Filter systems are industry standards. That said, many photographers skip these now, preferring to bracket exposures and blend in post.
Lens choice depends on your subject:
- Wide angles (16-35mm): Landscapes, architecture, environmental portraits. Captures the whole scene but can make the sun appear tiny.
- Standard zooms (24-70mm): Versatile for most situations. The Canon RF 24-70mm f/2.8L and Sony FE 24-70mm f/2.8 GM are workhorses.
- Telephotos (70-200mm+): Compresses perspective, makes the sun appear larger, isolates subjects against glowing backgrounds.
- Primes (35mm, 50mm, 85mm): Fast apertures for shallow depth of field and creamy bokeh.
Worth noting: clean your lenses before golden hour. Shooting into the sun amplifies every speck of dust and fingerprint. You'll save yourself hours of spot removal in Lightroom.
Common Mistakes That Ruin Golden Hour Photos
Chasing the sun instead of shooting it. Beginners see golden light and start firing away at everything. Slow down. Think about composition first. The light is the ingredient—not the whole recipe.
Overexposing highlights. Once they're blown, they're gone forever. Check your histogram. Make sure there's detail in the brightest areas. You can always brighten shadows; you can't recover clipped highlights.
Forgetting about white balance. Shooting auto? Your camera might "correct" that beautiful warmth into cold, clinical light. Lock it down. Or embrace the RAW workflow and adjust later.
Here's the thing—golden hour moves fast. You can't fiddle with settings endlessly. Know your gear. Pre-visualize your shots. Work efficiently.
That said, don't pack up too early. The "blue hour"—that 20-30 minutes after sunset when deep blues replace the orange—produces stunning images too. Cities come alive with warm artificial lights against cool skies. It's a different mood, equally worthwhile.
Mastering golden hour photography takes practice. Light behaves differently in every location, every season, every weather condition. But once you learn to read it, anticipate it, and work with it—those warm, glowing images will become a signature element of your photographic style. The world looks different through golden hour light. Go find out for yourself.